In previous blog, we have learnt What is JWT, Anatomy and its authentication flow. Refer here to
In this blog, we will see how a JWT works via an example. We will create JWT for a specific JSON payload and validate its signature.
Step-1
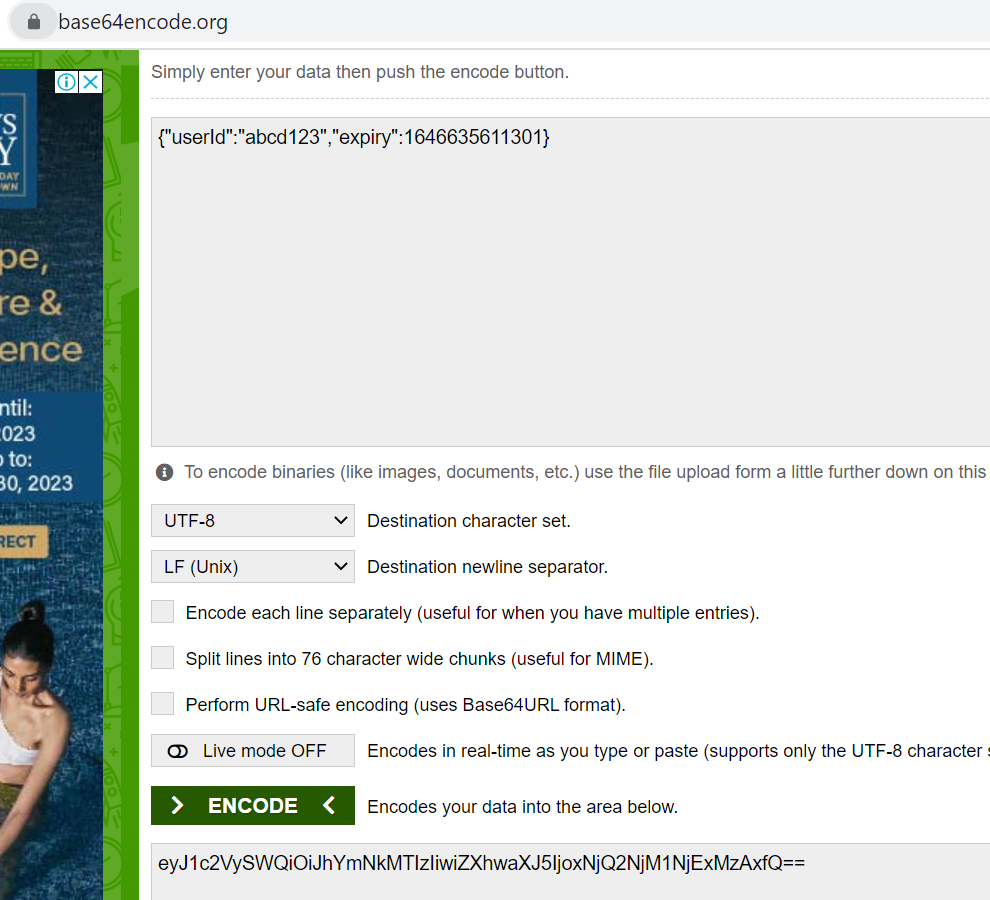
Create a JSON:
JSON payload example:
{
"userId": "abcd123",
"expiry": 1646635611301
}
Step-2
Create a JWT signing key and decide the signing algorithm:
We can generate a signing key using any secure random source.
- Signing key:
NTNv7j0TuYARvmNMmWXo6fKvM4o6nv/aUi9ryX38ZH+L1bkrnD1ObOQ8JAUmHCBq7Iy7otZcyAagBLHVKvvYaIpmMuxmARQ97jUVG16Jkpkp1wXOPsrF9zwew6TpczyHkHgX5EuLg2MeBuiT/qJACs1J0apruOOJCg/gOtkjB4c=- Signing algorithm:
HMAC + SHA256, also known asHS256.
Step-3
Creating the “Header”:
This contains the information about which signing algorithm is used
{
"typ": "JWT",
"alg": "HS256"
}
Step-4
Create a Signature:
- Similarly, remove the spaces from the header JSON and base64 encode it
Header json: {"typ":"JWT","alg":"HS256"}
base64 encoded value: eyJ0eXAiOiJKV1QiLCJhbGciOiJIUzI1NiJ9
Now concatenate <header>.<payload>
eyJ0eXAiOiJKV1QiLCJhbGciOiJIUzI1NiJ9.eyJ1c2VySWQiOiJhYmNkMTIzIiwiZXhwaXJ5IjoxNjQ2NjM1NjExMzAxfQ
Get the Signature:
run the
Base64 + HMACSHA256 function on the above concatenated stringBase64URLSafe(
HMACSHA256("eyJ0eXAiOiJKV1QiLCJhbGciOiJIUzI1NiJ9.eyJ1c2VySWQiOiJhYmNkMTIzIiwiZXhwaXJ5IjoxNjQ2NjM1NjExMzAxfQ", "NTNv7j0TuYARvmNMmWXo6fKvM4o6nv/aUi9ryX38ZH+L1bkrnD1ObOQ8JAUmHCBq7Iy7otZcyAagBLHVKvvYaIpmMuxmARQ97jUVG16Jkpkp1wXOPsrF9zwew6TpczyHkHgX5EuLg2MeBuiT/qJACs1J0apruOOJCg/gOtkjB4c=")
)
Results in:
3Thp81rDFrKXr3WrY1MyMnNK8kKoZBX9lg-JwFznR-M
Java code:
Java HMAC SHA256
Dependent on Apache Commons Codec to encode in base64.
import javax.crypto.Mac;
import javax.crypto.spec.SecretKeySpec;
import org.apache.commons.codec.binary.Base64;

public class ApiSecurityExample {
  public static void main(String[] args) {
    try {
     String secret = "secret";
     String message = "Message";

     Mac sha256_HMAC = Mac.getInstance("HmacSHA256");
     SecretKeySpec secret_key = new SecretKeySpec(secret.getBytes(), "HmacSHA256");
     sha256_HMAC.init(secret_key);

     String hash = Base64.encodeBase64String(sha256_HMAC.doFinal(message.getBytes()));
     System.out.println(hash);
    }
    catch (Exception e){
     System.out.println("Error");
    }
   }
}
Create JWT:

Append the generated signature like <header>.<body>.<signature>
eyJ0eXAiOiJKV1QiLCJhbGciOiJIUzI1NiJ9.eyJ1c2VySWQiOiJhYmNkMTIzIiwiZXhwaXJ5IjoxNjQ2NjM1NjExMzAxfQ.3Thp81rDFrKXr3WrY1MyMnNK8kKoZBX9lg-JwFznR-M
Verify JWT:
The authentication server will send the JWT back to the client’s frontend.
The frontend will attach the JWT to network requests to the client’s api layer.
At api layer, below steps are followed:
- Fetches the header part of the JWT (
eyJ0eXAiOiJKV1QiLCJhbGciOiJIUzI1NiJ9).
base64 decoding on it to get the plain text JSON:
{"typ":"JWT","alg":"HS256"}- Verifies that the
typfield’s value isJWTand thealgisHS256. It would reject the JWT if fails to verify.
Fetches signing secret key and runs the same
Base64URLSafe(HMACSHA256(...))If the incoming JWT’s body is different, this step will generate a different signature.
- Checks that the generated signature is the same as the signature from the incoming JWT. If it’s not, then the JWT is rejected.
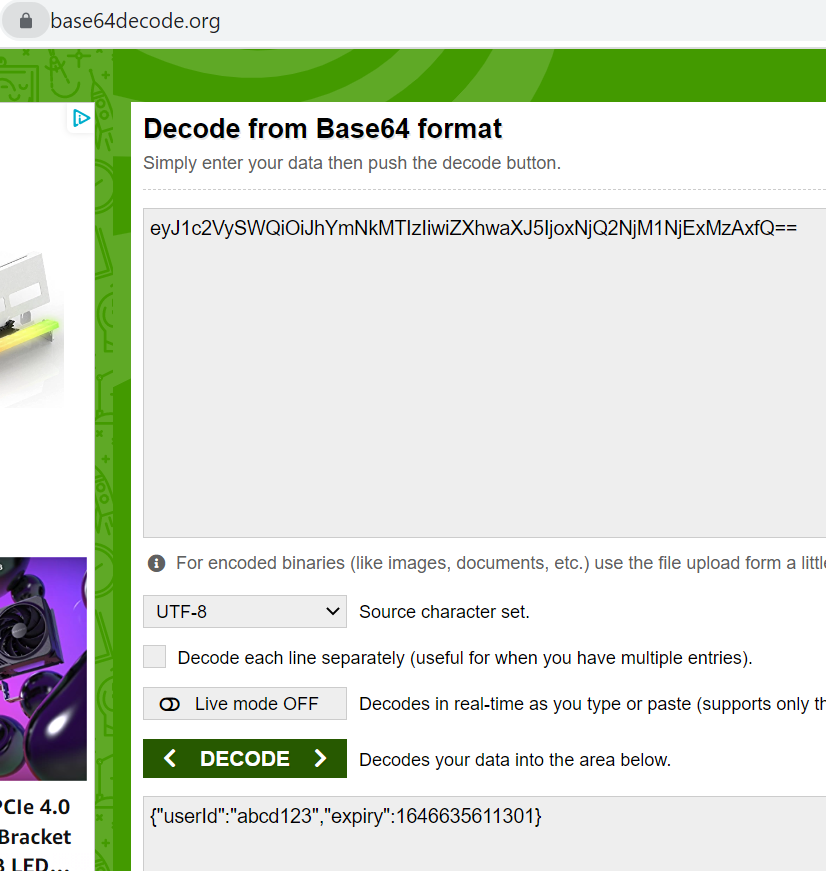
base64 decode the body of the JWT (
eyJ1c2VySWQiOiJhYmNkMTIzIiwiZXhwaXJ5IjoxNjQ2NjM1NjExMzAxfQ) to give us {"userId":"abcd123","expiry":1646635611301}.If the current time (in milliseconds) is greater than the JSON’s
expiry time (since the JWT is expired), JWT is rejected.Accept the JWT if it approves all above steps.
Pros & Cons of JWT:
Advantages:
- Secure: JWTs are digitally signed using either a secret (HMAC) or a public/private key pair (RSA or ECDSA) which safeguards them from being modified by the client or an attacker.
Efficient / Stateless: It’s quick to verify a JWT since it doesn’t require a database lookup.
- Stored only on the client: You generate JWTs on the server and send them to the client. The client then submits the JWT with every request. This saves database space.
Drawbacks:
Dependent on one secret key: The creation of a JWT depends on one secret key. If that key is compromised, the attacker can fabricate their own JWT which the API layer will accept.
Happy Coding!


