Set up Dispatcher in AEM on Windows
In this tutorial, i am going to take you through how to set up a dispatcher in AEM on windows.
What is Dispatcher?
Dispatcher is Adobe
Experience Manager's caching and/or load balancing tool. Dispatcher also helps
to protect your AEM server from attack.
The Dispatcher
helps realize an environment i.e. both fast and dynamic. It works as a part of
a static HTML server, with the aim of:
- Storing
as much of the site content as is possible, in the form of a static website.
- Accessing
the layout as little as possible.
Install
Apache Webserver on Windows:
Download Apache
server from the trusted Apache site. Follow below link:
http://archive.apache.org/dist/httpd/binaries/win32/
A lot of new versions are available for Apache. I am using apache server 2.2. Follow the below steps to set up on windows:
Step 1: Download

Step 2: Double click the downloaded msi file and click
next and finish

By default, it will install at C:\Program Files
(x86)\Apache Software Foundation\Apache2.2
 |
| Apache location |
Step 3: Go to your httpd.conf file C:\Program Files (x86)\Apache Software Foundation\Apache2.2\conf
· Change default Define SRVROOT or ServerRoot path to absolute path of your apache2.2 folder “ C:\Program Files (x86)\Apache Software Foundation\Apache2.2\conf” (Line – 38).
· Update listen port Listen 8080 (Line – 47), it is optional if you don’t want to change you can keep default port as 80.
· Update ServerName localhost:8080 (Line – 173), it is optional if you don’t want to change you can keep default port as 80.
· Now Go to the bin folder (C:\Program Files (x86)\Apache Software Foundation\Apache2.2\bin) and open command prompt.
· run httpd -k start to start the server.
#Common Issue while starting the server
If it says the port is already bound to 80 port on 0.0.0.1:80 then change port in httpd.conf file.
Then change the port. Let’s say I am changing to port 81. Change port at line #47 and save it.
Step 4: Run httpd -k start command to start the apache server.
Check error.log in the logs folder of C:\Program Files (x86)\Apache Software
Foundation\Apache2.2\logs.
If no error then opens a browser and
type localhost. It shows it works!

You can change this content. For this:
- Go to C:\Program Files(x86)\ApacheSoftwareFoundation\Apache2.2\htdocs
- Open Index.html file.
- Save this file and refresh the browser. You can see Updated content.

· Download dispatcher
build
· Modify Apache web
server httpd.conf file
· Modify
dispatcher.any file
· Restart Apache web
server and you are done.
Go to below link:
https://www.adobeaemcloud.com/content/companies/public/adobe/dispatcher/dispatcher.html

Download the selected file. I am selecting no ssl.
Unzip dispatcher-apache2.2-windows-x86-4.2.3.zip
file
Note# Its better to use the same version for both dispatcher and apache. I am using 2.2 for both. if you are working with 2.4 apache and 2.2 dispatcher then you might face some issue.

It contains below files:
§ disp_apache2.2.dll – This is my
dispatcher module file, which we will plugin with web server.
§ dispatcher.any – It is our dispatcher configuration file.
§ author_dispatcher.any – Sample file for configuring our dispatcher.
§ httpd.conf.disp2.conf – sample file
to configure apache webserver.
- Go to C:\Program Files (x86)\Apache Software Foundation\Apache2.2\conf location where you have installed your apache server.
- Open httpd.conf.disp2 file.
I am pasting line #130 where my load modules are ending.

Note:-This setting is used by apache webserver to load my dispatcher
when next time Apache web server is started
Copy line #236-248 from httpd.conf.disp2.conf file and paste it to httpd.conf file after
ending of </IfModule>.
Below are the lines, you can use it directly.
# location of the configuration file. eg:
'conf/dispatcher.any'
DispatcherConfig conf/dispatcher.any
# location of the dispatcher log file. eg:
'logs/dispatcher.log'
DispatcherLog logs/dispatcher.log
# log level for the dispatcher log, can be
either specified
# as a string or an integer (in
parentheses)
# error(0): Errors
# warn(1):
Warnings
# info(2):
Infos
# debug(3): Debug
# trace(4): Trace
DispatcherLogLevel warn
# if turned on, the dispatcher looks like a
normal module
DispatcherNoServerHeader Off
# if turned on, request to / are not
handled by the dispatcher
# use the mod_alias then for the correct
mapping
DispatcherDeclineRoot Off
# if turned on, the dispatcher uses the URL
already processed
# by handlers preceeding the dispatcher
(i.e. mod_rewrite)
# instead of the original one passed to the
web server.
DispatcherUseProcessedURL Off
# if turned to 1, the dispatcher does not
spool an error
# response to the client (where the status
code is greater
# or equal than 400), but passes the status
code to
# Apache, which e.g. allows an
ErrorDocument directive
# to process such a status code.
#
# Additionally, one can specify the status
code ranges that should
# be left to web server to handle, e.g.
#
# DispatcherPassError 400-404,501
DispatcherPassError 0
#
# DispatcherKeepAliveTimeout specifies the
number of seconds a
# connection to a backend should be kept
alive. If not set or
# set to zero, connections are not kept
alive.
#
#DispatcherKeepAliveTimeout 60
</IfModule>
It contains below entries:
·
DispatcherConfig – location of the configuration
file
· DispatcherLog– location of the dispatcher log file
· DispatcherPassError – to use your
dispatcher for handling errors, if set to 1 then webserver will handle errors.
·
DispatcherKeepAliveTimeout – Time
interval for which your request should be kept alive.
Now copy the dispatcher handler from httpd.conf.disp2.conf (line #370) to httpd.conf file(line #238). this will override the default handle of web server and allow the dispatcher to entertain all incoming requests.
Add below code:
<IfModule disp_apache2.c>
ModMimeUsePathInfo On
# enable dispatcher for ALL request. if this is too restrictive,
# move it to another location
SetHandler dispatcher-handler
</IfModule>
Options FollowSymLinks
AllowOverride None
</Directory>
Copy this disp_apache2.2.dll file from downloaded
dispatcher and paste it under C:\Program Files (x86)\Apache
Software Foundation\Apache2.2\modules.
Copy dispatcher.any file from downloaded
dispatcher and paste it under C:\Program Files (x86)\Apache
Software Foundation\Apache2.2\conf directory.
- Change the port number in line 38. If you are setting up dispatcher for publish instance then use 4503 (default port of publish) or add your publish port here if not 4503.

- Then go to line #77

§ For Publish the instance you should deny all request and allow specific, For an author instance you should allow all and deny specific.
§ Update cache Doc
Root. It should exactly match my httpd.conf Documentroot path. Copy Document
root path from httpd.conf file and paste it in dispatcher.any file at line 132.

§ Save all settings
and Restart your Apache Web server.
httpd -k start
Test
Dispatcher Installation:-
To test whether the dispatcher is configured properly or not. Check logs in your
directory. You will find dispacther.log in the logs folder

Now open localhost:81 to your browser.
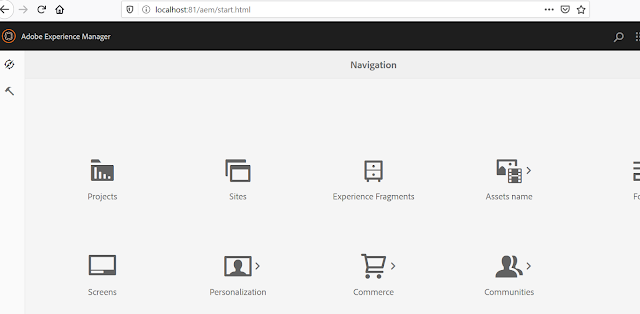
You will see, AEM instance is working on apache. I set up for the author. You can set port 4503 to publish.
Check http://localhost:81/editor.html/content/we-retail/us/en.html is working for you.

Congratulations!!! Your dispatcher is set up now.
- Add below lines just before end of this <IfModule disp_apache2.c> tag in httpd.conf file.
RewriteRule ^/$ /content/we-retail.html [R]
- And uncomment line 119 which is:

RewriteRule ^/$ /content/we-retail.html [R] while setting up rules. So when you
hit loclahost:81 then it will automatically go to http://localhost:81/content/we-
retail.html

Congratulations!!!
Your rules also working now👍


prooved very helpful for me.
ReplyDeleteNice. It helped me alot. I followed all steps and my dispatcher is working fine.
ReplyDeleteNice article.
ReplyDeleteNice article. Through this I am able to set up on windows.
ReplyDelete